2 point perspective
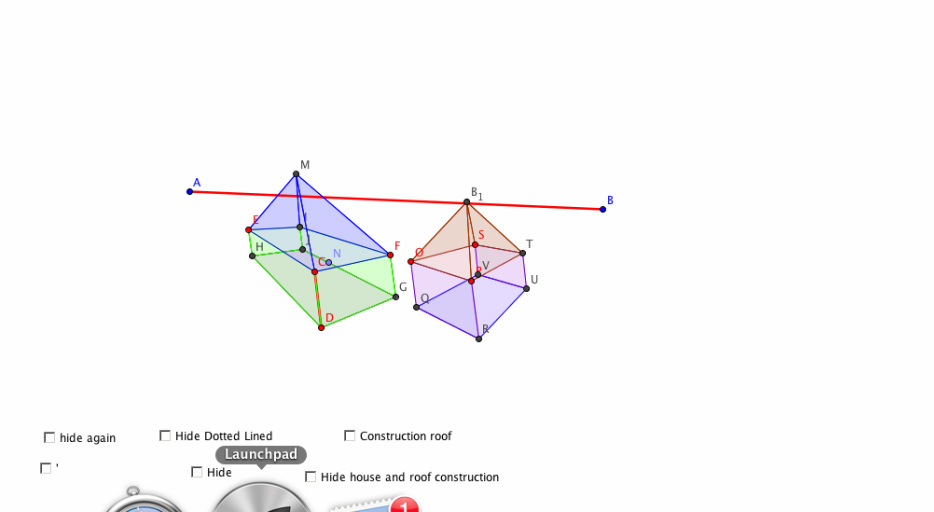
1 point perspective
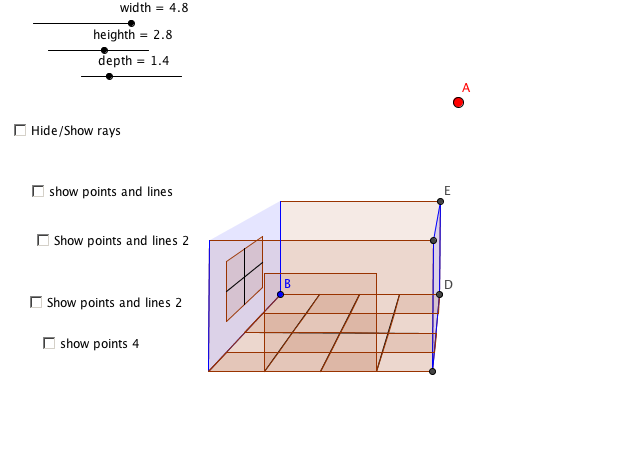
Geometric Net
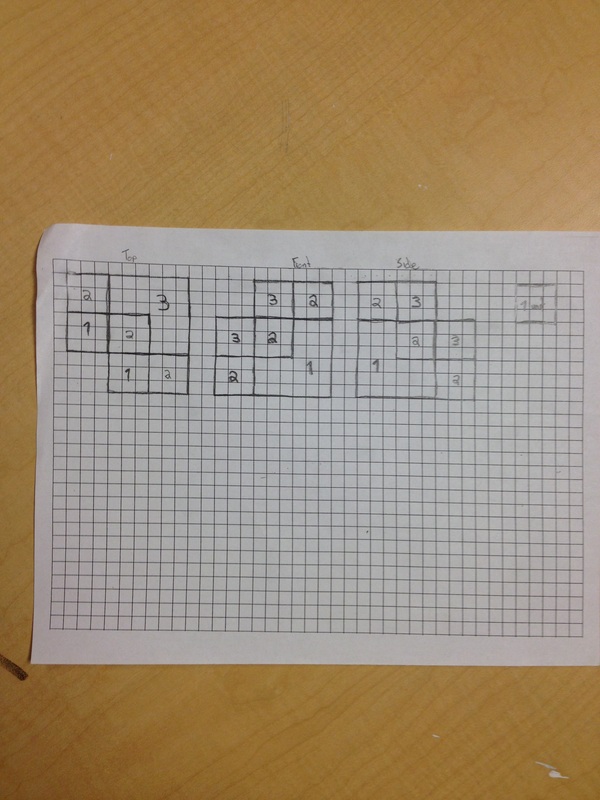
orthographic
Isometric
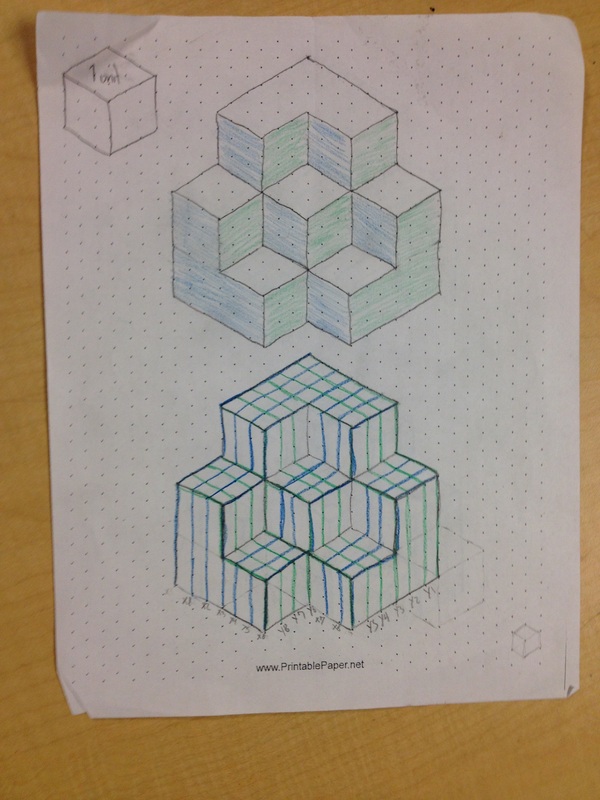
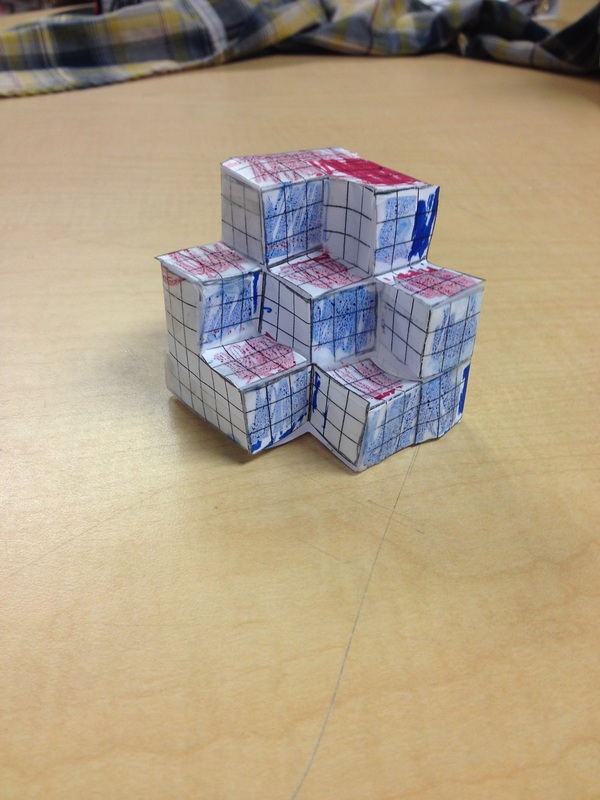
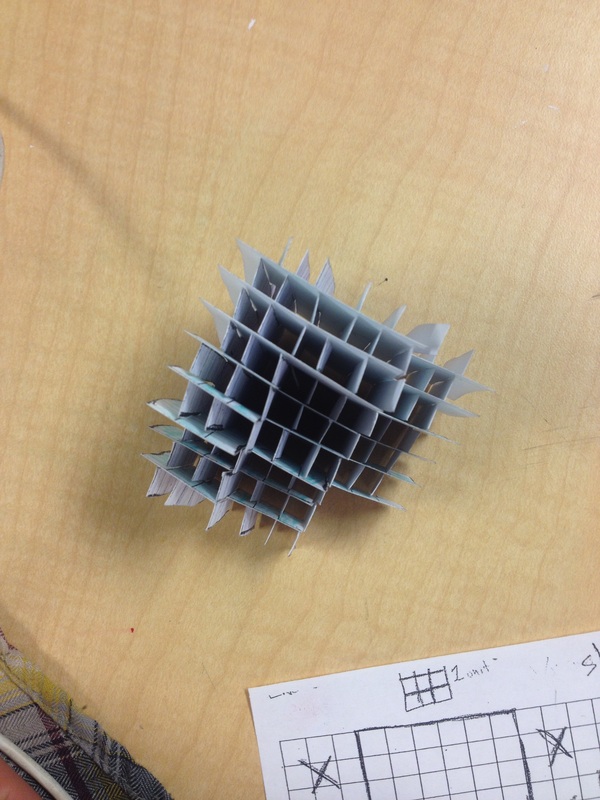
Slice Form


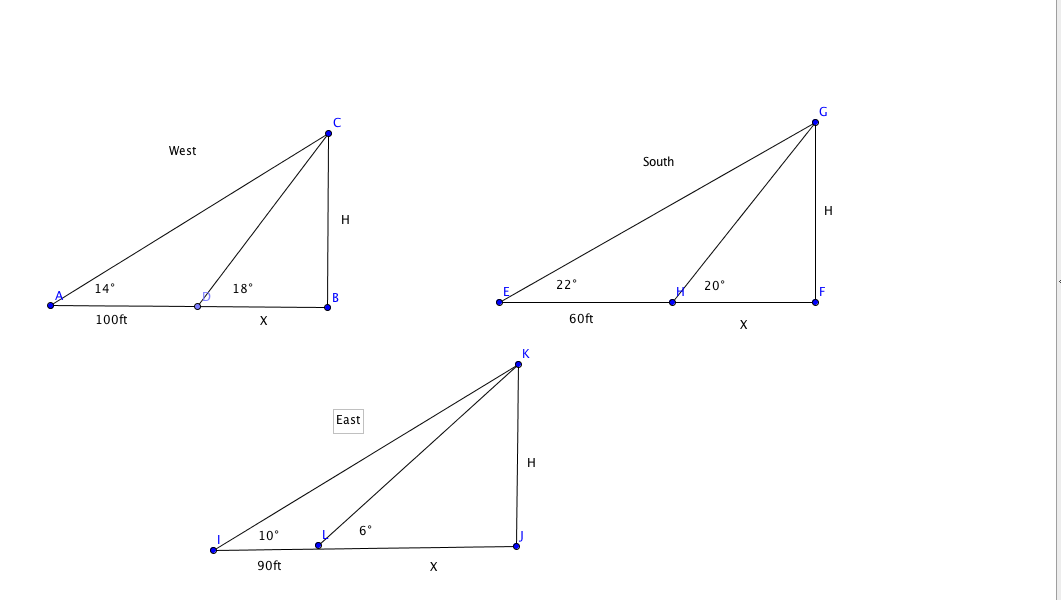
TRIGONOMETRY in real Life
In this project we used our newly developed knowledge of trigonometry and used it in the real world. What happened is we went outside and found an object in the distance above us, we then found the angle from where we were to the object we than moved forward or backward around 60-100ft. and remeasured the angle. With the two angles and the distances between we had enough information to find the height of the object from us.

Equations
|
tan18= h/x tan14=h/(x+100) h=xtan18 h=tan14+100tan14 xtan18=tan14+100tan14 x(tan14-tan18)=100tan14 x=100tan14/tan14-tan18 Simplified x=330ft Plug in X h=330tan18 h=113.223 |
tan20= h/x tan22=h/(x+60)
h=xtan20 h=tan22+60tan22 xtan20=tan22+60tan22 x(tan20-tan22)=60tan22 x=60tan22/tan22-tan20 Simplified x=605.192 Plug in X h=605.192tan20 h=226.271ft |
tan6= h/x tan10=h/(x=90)
h=xtan6 h=tan10+90tan10 xtan6=tan10+100tan10 x(tan10-tan6)=90tan10 x=90tan10/tan10-tan6 Simplified x=330ft Plug in X h=222.814tan6 h=29.418 |
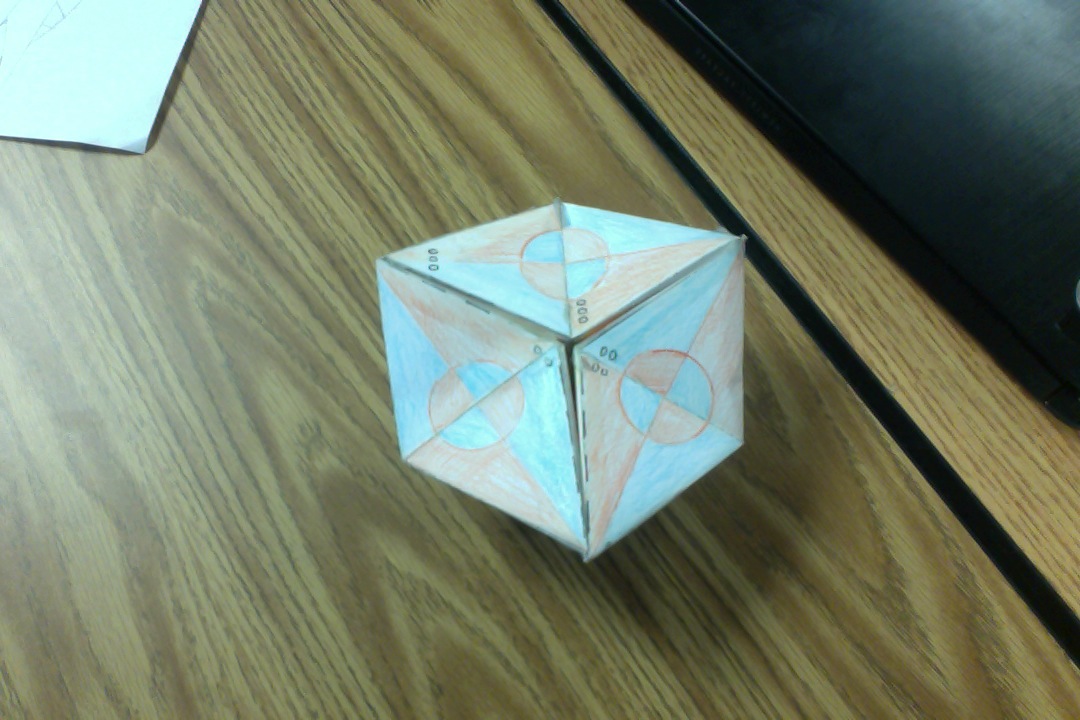
Hexaflexagon
|
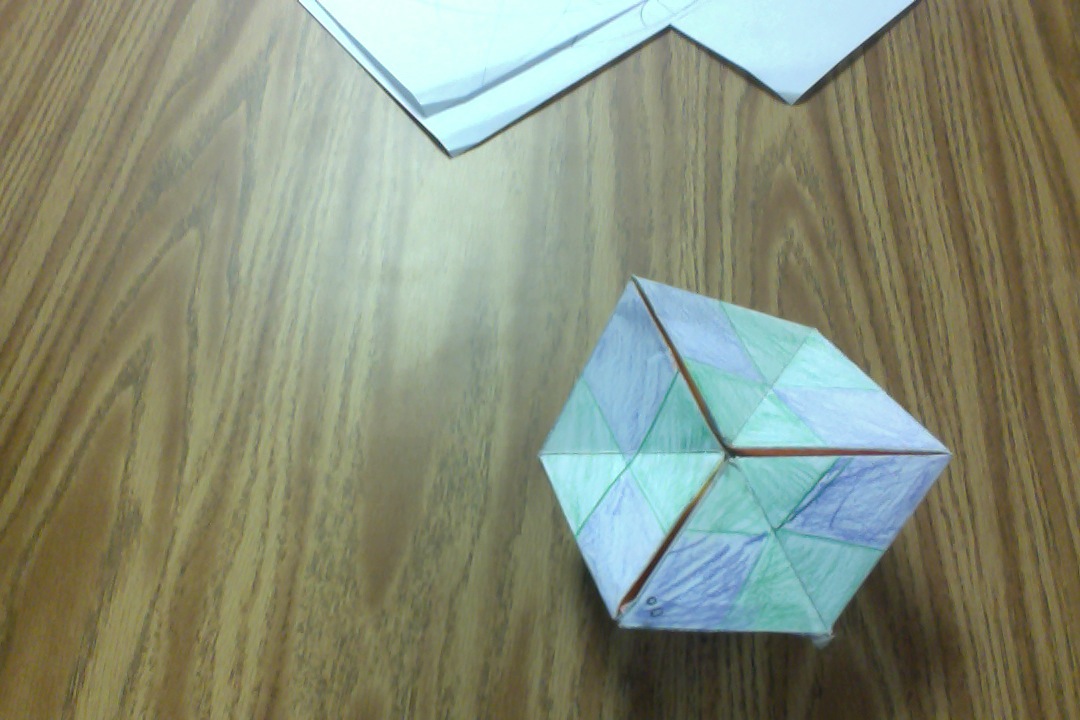
To make the pattern look like it was one image we used lines of reflections. We reflected the pattern over the lines of the other sides to make it look like one image as shown in the picture. What I liked about this project was being able to see all the stuff we learned about line reflection and put it into a 3D model. I really liked to see all the other cool designs that the other students made.
My favorite part of the hexaflexagon was the first picture. I liked it the best because it was my most intercut design and it turned out looking really good. For me I started out with just a simple solid color pattern and worked my way up to the better design. I really enjoyed this project but when it came to the folding part it got a little bit tricky and there was definitely the possibility to mess it up. What I would refine about this project would probably be my shading of the patterns. I didn't take my time doing it the first time so it looks a little messy. One more thing that I would refine would be instead of using tape when putting it all together I would use glue. The tape made the maneuverability of the hexaflexagon a little bit rough but the kids who used glue have much smoother transitions. |
|
SnAIL trail
|
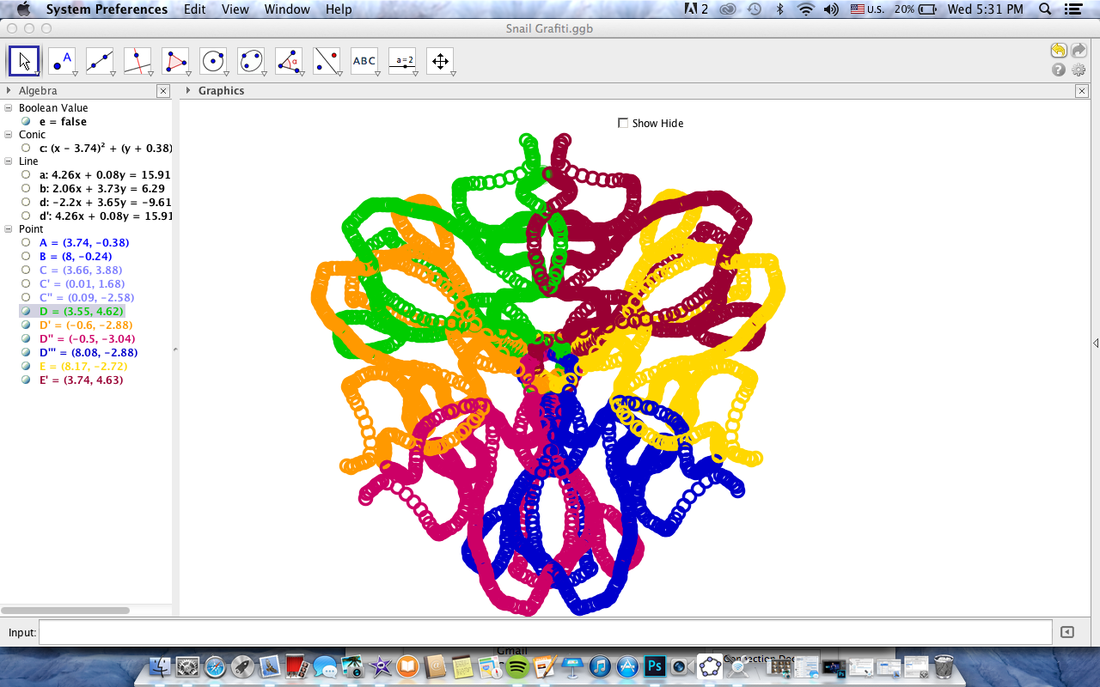
For this project we used a software called GeoGebra. GeoGebra is program in with you can create many different types of lines, shapes, patterns, and graphs. In this particular project we were working on reflections. we made a circle divided up into six different slices at the top of each slice was a color. When you dragged a color all the other colors would do exactly the same thing. This would create the appearance that they were all reflected from the same line.
What I learned in the project was to fallow directions very carefully. This lab was some what hard to create so it was very important that you fallowed close directions. |
|
Two rivers
For the two river lab we used GeoGebra again. What the goal of the lab was to find the minimum distance of the sum of two numbers, the distance of line A from point A and the distance of line B from point A. The lines represent rivers and the point represents where you are going to put your house. Where the two rivers met there was a sewer treatment plant so you had to build your house five miles away from the sewer. That distance is represented by the red circle.
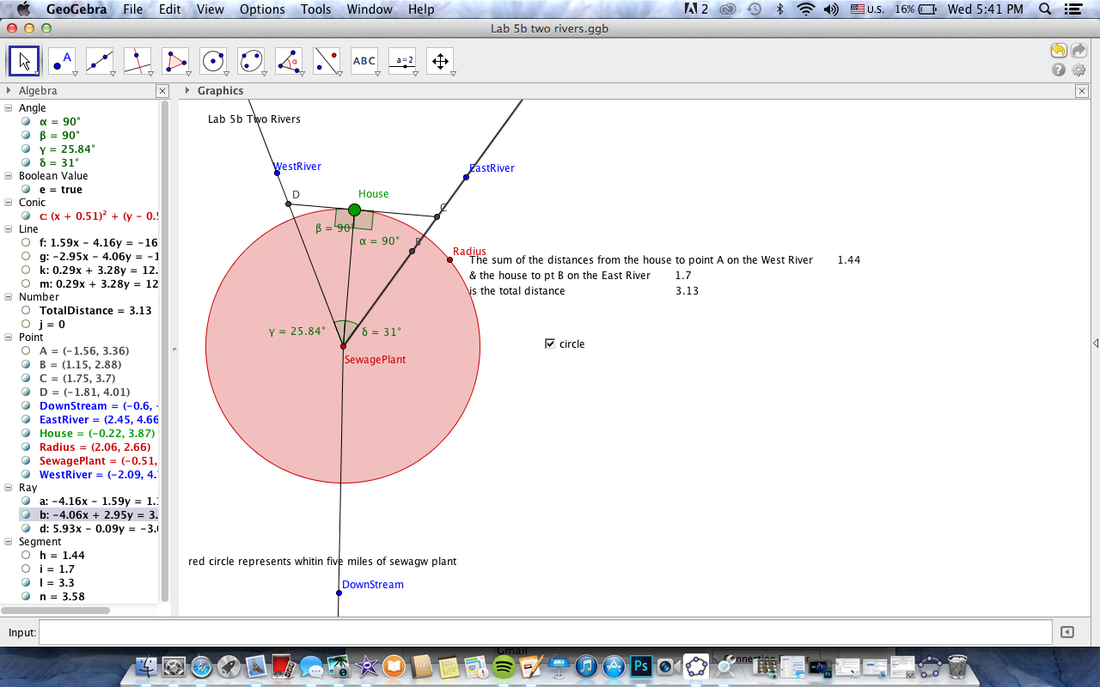
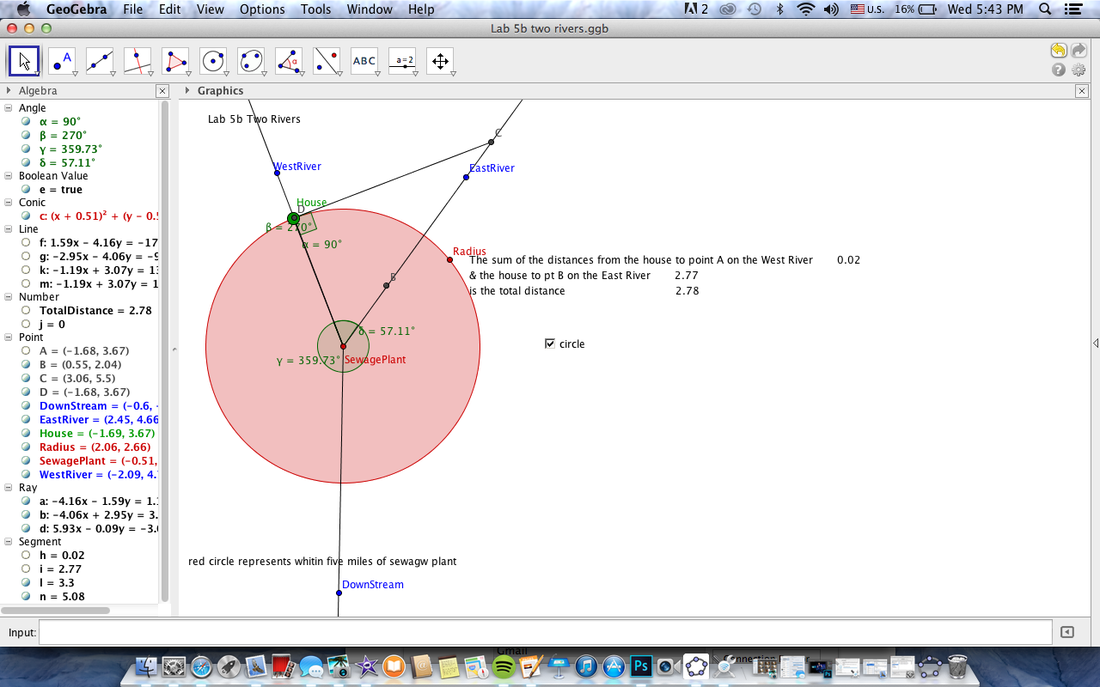
The top picture shows you where you shouldn't put your house. It is still five miles away from the sewage plant but the total sum of the two distances to the rivers from the house is still not as short as it could be. The second picture shows the correct place to build your house and that is on one of the rivers. It is still five miles away from the sewer and the sum of the two distances is as low as it will get.
Burning tent
The point of this was to find the shortest two part path. What you were trying to do was go from your tent to the river to get a bucket of water then go to the burning tent and put in out. You were trying to find the shortest possible path to do this. How we did this was by creating a line to the river the a line from the point where your previous line intersected the river to the tent. Then we just messed around until the two out going angles where the same meaning the two lines were perpendicular bisectors of one another.

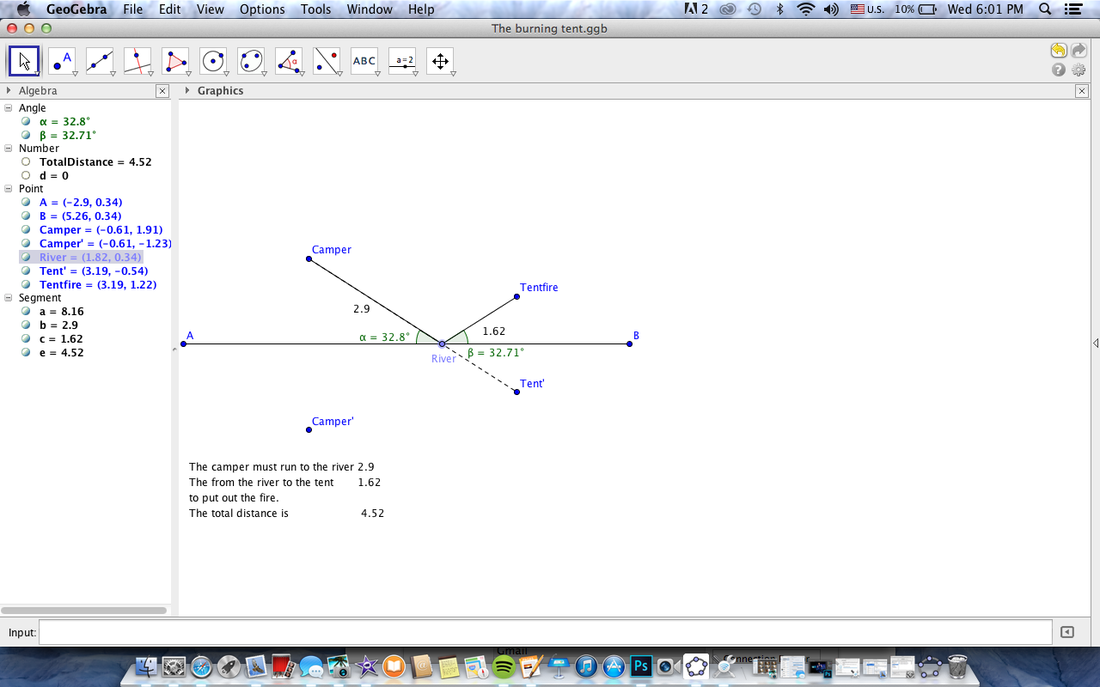
In the first picture it shows the incorrect solution. It’s sum of the two distances is not as small as it could be and the two lines are not perpendicular bisectors. The second picture shows the correct answer being that the two lines are in fact perpendicular bisectors.
